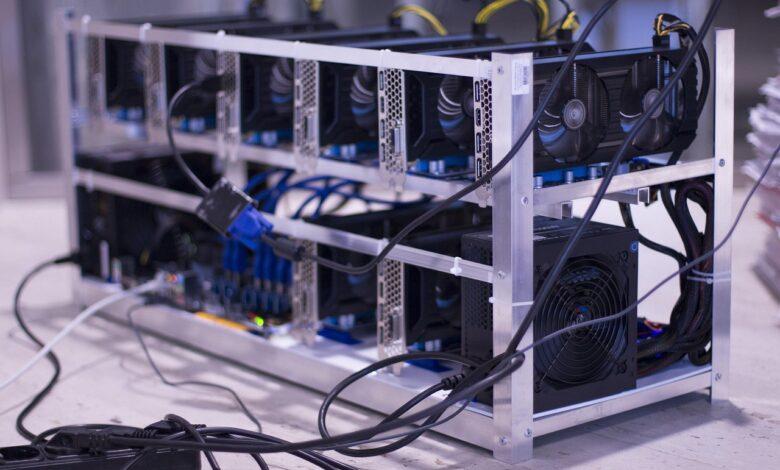
Begin with the frame; this is the skeleton of your entire operation and dictates the physical limits of your six-gpu setup. A sturdy, open-air aluminium frame is non-negotiable for adequate airflow, directly impacting the thermal performance and longevity of your expensive hardware. You are not just building a computer; you are constructing a dedicated industrial machine from the ground up, where every component selection is a calculated decision for sustained 24/7 operation.
The core of this assembly is the motherboard, a specialised model supporting six or more PCI-E slots. Pair this with a CPU that has just enough power to manage the data flow–an Intel Celeron or AMD Athlon is typically sufficient, avoiding unnecessary power draw. The true workhorses are the gpu units themselves; a mixed set of AMD and Nvidia cards can complicate driver setup, so consistency across your six cards is advised for a smoother initial configuration. Your power supply, or more likely, a combination of two 1200W+ PSUs linked with a synchroniser, must deliver clean, stable power with significant overhead to prevent failures.
Finalising the construction involves meticulous cable management and a rigorous software setup. Installing the mining OS and configuring the miner software to connect to your chosen cryptocurrency pool is where the hardware assembly transforms into a functional crypto rig. This phase requires precise BIOS settings adjustments to enable ‘Above 4G Decoding’ and set PCI-E lanes to Gen1, ensuring all six GPUs are recognised and can operate in unison. The first successful boot and subsequent hashrate reporting will validate the entire building process, turning a collection of components into a profitable miner.
Choosing Hardware Components
Select a motherboard specifically designed for a six-gpu configuration, such as the Asus B250 Mining Expert, which supports up to 19 GPUs but is perfectly scaled for our six-gpu setup. This choice eliminates the need for risky BIOS mods to accommodate more cards than standard consumer boards allow. Pair this with a Celeron G-series CPU; its low power draw and cost are ideal, as the processor’s performance is largely irrelevant for the mining operation.
Power and Frame Fundamentals
Source two power supplies, like the 1200W and 800W models from a reputable brand such as Corsair or EVGA, linked with a dual PSU adapter cable. This split-power approach provides a safe overhead for the six graphics cards and the rest of the hardware, preventing a single unit from being maxed out. For the frame, a simple open-air aluminium design is non-negotiable; it facilitates optimal airflow, keeping your GPU core temperatures below 70°C for sustained mining health.
GPU Selection and System Memory
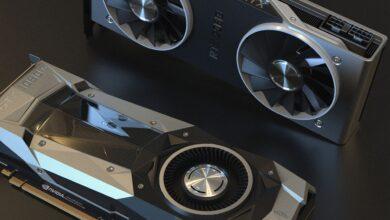
Acquire six identical GPUs from the AMD RX 6000 or NVIDIA 30-series line-ups to streamline driver installation and rig stability. Mixing and matching different models often leads to conflicts that complicate the assembly and operation. Install a single 8GB stick of DDR4 RAM; this is more than sufficient for the mining software and operating system, making any additional capacity a pointless expense in this specific hardware construction.
The final assembly involves using PCIe risers, verified to be the powered version, to connect each gpu to the motherboard. This hardware setup is the bedrock of the entire six-gpu miner, allowing for the physical spacing and electrical stability required for a profitable cryptocurrency operation built from the ground up.
Assembling The Frame
Begin the frame construction with a flat, non-conductive surface like a wooden workbench to prevent any electrical shorts during the assembly. Your goal is to build a rigid skeleton that can support significant weight and resist torsion; a flimsy frame will lead to instability and potential damage to your GPU connectors. Lay out all the aluminium V-slot rails, corner brackets, and screws, checking the component list against your hardware inventory before tightening anything.
Structural Integrity and Component Placement
The primary load-bearing points are the motherboard tray and the GPU mounting bars. For a six-gpu miner, you need two vertical GPU rails long enough to accommodate six cards with ample space between them for airflow–aim for a 40-50mm gap. Secure the motherboard tray at one end of the frame, ensuring it is perfectly level. A common error is constructing the frame with the motherboard area too narrow, which can cause the board to short against the metal rails. Assemble the basic open-box structure first, only fully tightening the bolts once you are certain all angles are 90 degrees and the frame sits square on the ground.
Integrating Hardware and Pre-empting Issues
Before final assembly, perform a dry-fit of the major hardware. Place the power supply on its mount and slot the GPUs onto the risers while they are attached to the frame. This test-run reveals clearance issues, such as a GPU being too long and contacting the PSU, or a SATA cable straining at an awkward angle. The construction of the frame is not complete until you have confirmed that every power cable can be routed cleanly and every component is accessible for maintenance. A well-planned frame setup, built from the ground up with the entire hardware stack in mind, is the foundation of a reliable mining rig.
Installing GPUs And Wiring
Mount your first GPU onto the frame’s PCIe riser, ensuring the card clicks securely into place. For a stable six-gpu construction, begin with the outer slots and work inwards, maintaining even weight distribution across the frame. Verify a minimum 2cm gap between each card; this air gap is non-negotiable for managing thermal output in a dense hardware setup.
Power Circuit Configuration
Do not power all six GPUs from a single daisy-chained PCIe cable. A robust approach uses one PCIe cable per 8-pin GPU connector, or at a maximum, two connectors per cable if using high-quality 16-gauge wiring. For a typical rig with six 300W cards, you are managing a potential 1800W load from the GPUs alone. Your power supply unit’s 12V rail must handle this, plus motherboard overhead. Split the load between two power supplies if necessary, using a dual PSU adapter.
Data and Control Wiring
Connect the USB cable from each PCIe riser to an available port on the motherboard. A six-gpu assembly will likely require a powered USB hub to provide sufficient, stable ports. Keep these data cables tidy and routed away from the power lines to prevent signal interference. Use zip ties to secure all wiring to the frame, preventing contact with GPU fans and reducing stress on the connectors. This meticulous assembly prevents the most common post-build issues: riser failure and USB dropouts.
Before applying full power, perform a ground check. Use a multimeter to confirm continuity between the PSU casing, the mining rig frame, and a known ground source. A single grounding point prevents ground loops, a frequent cause of unexplained system instability in a crypto mining setup. This final step solidifies the entire hardware construct, transforming individual components into a unified, operational miner.